
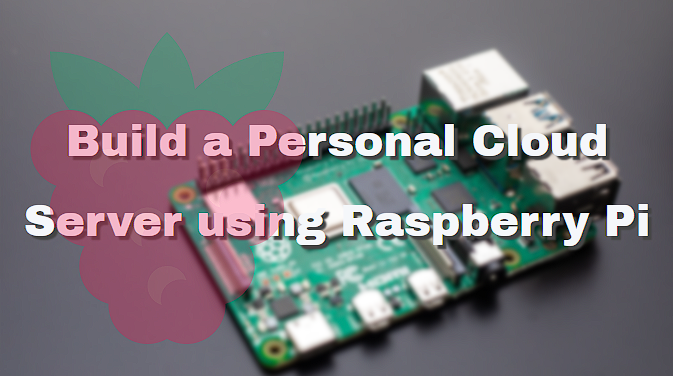
- Build a Personal Cloud Server using Raspberry Pi
-
Table of Contents
“Unlock the Power of Your Own Personal Cloud with Raspberry Pi!”
Introduction
If you’re looking for a way to store and access your data from anywhere, a personal cloud server using Raspberry Pi is a great solution. With a Raspberry Pi, you can build a personal cloud server that is both secure and cost-effective. This guide will walk you through the steps of setting up a personal cloud server using Raspberry Pi. You’ll learn how to install the necessary software, configure the server, and access your data from anywhere. With a personal cloud server, you’ll be able to store and access your data from any device with an internet connection. So let’s get started!
Step-by-Step Guide to Building a Personal Cloud Server with Raspberry Pi
Introduction
A personal cloud server is a great way to store and access your data from anywhere in the world. With a Raspberry Pi, you can build your own personal cloud server at a fraction of the cost of a commercial solution. This guide will walk you through the steps of setting up a Raspberry Pi as a personal cloud server.
Step 1: Gather the Necessary Materials
Before you begin, you will need to gather the necessary materials. You will need a Raspberry Pi, a microSD card, a power supply, an Ethernet cable, and a USB drive.
Step 2: Install the Operating System
Once you have all the necessary materials, you will need to install the operating system on the Raspberry Pi. You can download the latest version of the Raspberry Pi OS from the official website. Once you have downloaded the image, you will need to write it to the microSD card.
Step 3: Configure the Network
Once the operating system is installed, you will need to configure the network settings. You can do this by connecting the Raspberry Pi to your router via an Ethernet cable. Once connected, you can access the Raspberry Pi’s settings page and configure the network settings.
Step 4: Install the Cloud Server Software
Once the network is configured, you will need to install the cloud server software. There are several options available, but the most popular is Nextcloud. You can download the software from the official website and follow the instructions to install it on the Raspberry Pi.
Step 5: Configure the Cloud Server
Once the software is installed, you will need to configure the cloud server. This includes setting up user accounts, setting up storage locations, and configuring security settings.
Step 6: Connect the USB Drive
Once the cloud server is configured, you will need to connect the USB drive to the Raspberry Pi. This will allow you to store your data on the USB drive and access it from anywhere in the world.
Step 7: Test the Cloud Server
Once everything is set up, you can test the cloud server by accessing it from another device. If everything is working correctly, you should be able to access your data from anywhere in the world.
Conclusion
Building a personal cloud server with a Raspberry Pi is a great way to store and access your data from anywhere in the world. With this guide, you should now have all the information you need to get started. Good luck!
Exploring the Benefits of Using Raspberry Pi for Personal Cloud Server Setup
The Raspberry Pi is a small, affordable, and powerful computer that has become increasingly popular for a variety of uses. One of the most interesting applications of the Raspberry Pi is to use it as a personal cloud server. This setup can provide a number of benefits, including increased storage capacity, improved security, and greater flexibility.
One of the primary advantages of using a Raspberry Pi for a personal cloud server is the increased storage capacity. The Raspberry Pi can be connected to an external hard drive, allowing for a much larger storage capacity than what is available on the device itself. This can be especially useful for those who need to store large amounts of data, such as photos, videos, and music.
Another benefit of using a Raspberry Pi for a personal cloud server is improved security. By setting up the Raspberry Pi as a server, users can ensure that their data is stored securely and is not accessible to anyone else. This can be especially important for those who need to store sensitive information, such as financial records or personal documents.
Finally, using a Raspberry Pi for a personal cloud server can provide greater flexibility. The Raspberry Pi can be used to access data from anywhere, allowing users to access their data from any device with an internet connection. This can be especially useful for those who need to access their data while on the go.
Overall, using a Raspberry Pi for a personal cloud server can provide a number of benefits, including increased storage capacity, improved security, and greater flexibility. For those looking for an affordable and powerful way to store and access their data, the Raspberry Pi is an excellent choice.
Tips and Tricks for Optimizing Your Raspberry Pi Personal Cloud Server Performance
1. Use a High-Speed MicroSD Card: Using a high-speed microSD card is essential for optimizing your Raspberry Pi personal cloud server performance. A high-speed card will ensure that your Raspberry Pi can access data quickly and efficiently.
2. Overclock Your Raspberry Pi: Overclocking your Raspberry Pi can help to increase its performance. However, it is important to note that overclocking can cause your Raspberry Pi to become unstable and can even damage it if done incorrectly. Therefore, it is important to research the correct way to overclock your Raspberry Pi before attempting it.
3. Install a Lightweight Operating System: Installing a lightweight operating system such as Raspbian or Ubuntu can help to optimize your Raspberry Pi personal cloud server performance. These operating systems are designed to be lightweight and efficient, allowing your Raspberry Pi to run faster and more efficiently.
4. Use a High-Speed Network Connection: Using a high-speed network connection is essential for optimizing your Raspberry Pi personal cloud server performance. A high-speed connection will ensure that your Raspberry Pi can access data quickly and efficiently.
5. Utilize a VPN: Utilizing a VPN can help to increase the security of your Raspberry Pi personal cloud server. A VPN will encrypt your data and help to protect it from malicious actors.
6. Monitor Your Server Performance: Monitoring your Raspberry Pi personal cloud server performance is essential for optimizing its performance. You can use tools such as htop or top to monitor your server performance and identify any areas that need improvement.
7. Utilize a Cloud Storage Service: Utilizing a cloud storage service such as Dropbox or Google Drive can help to optimize your Raspberry Pi personal cloud server performance. These services allow you to store your data in the cloud, allowing you to access it quickly and efficiently.
8. Utilize a Content Delivery Network: Utilizing a content delivery network such as Cloudflare can help to optimize your Raspberry Pi personal cloud server performance. A content delivery network will cache your data and serve it to users quickly and efficiently.
Conclusion
Building a personal cloud server using Raspberry Pi is a great way to create a secure and reliable cloud storage solution for your home or business. It is an affordable and easy-to-use solution that can be used to store and share files, photos, music, and other data. With the right hardware and software, you can create a powerful and secure cloud storage solution that is accessible from anywhere in the world. With the Raspberry Pi, you can create a personal cloud server that is both secure and reliable.
Build a Personal Cloud Server using Raspberry Pi
Download Respberry Pi OS: Website
How to Install OpenVPN in Ubuntu: Read More

Comments are closed.